Frame rates: should you stick to 24fps for “the film look?” Will higher rates improve video quality?

I was asked a technical question that deserves a long-winded answer, so here it is.

Should you stick to 24fps for “the film look?” Will higher rates improve video quality?


Frame rate is a little complex. Let’s ignore PAL’s 25fps/50fps to keep it simple. Most people are used to 24fps because it’s what film and movies have used for a very long time; 24fps is basically the slowest frame rate where movements still look natural. 30fps is generally associated with “video” as in “not film.” My videos are generally all edited in 30fps. A lot of YouTubers work with 24fps. As gamers and gaming videos have widely proliferated and bandwidth has become massively available, 60fps has also become fairly widely accepted, and there is a degree of realism in 60fps that isn’t present at lower frame rates.

The issue with higher frame rates is that they inherently force a minimum exposure time (what we call “shutter speed” even though there is no mechanical shutter in video) which is the reciprocal of the frame rate. You can’t record at 60fps with a 1/50 sec. “shutter speed” because you have to generate frames 60 times a second, not 50. Film has a frame rate of 24fps and a shutter speed of 1/48 sec. because the mechanical half-circle shutter would spin around such that it covered the film as it was advanced to the next frame and then opened up and closed when the frame was in place. On a modern camera, you can get extreme motion blur by using longer times than film’s 1/48 second, but only if you use 24fps or 30fps frame rates.

The beauty of 60 frames per second

Here’s why I would prefer to shoot 60fps 1/60 sec. all the way though: if you frame-blend 60fps 1/60 frames down to 30fps, you get the same exact video that you’d get at 30fps 1/30; if you didn’t use frame blending and instead used frame sampling, you’d get the exact same video as if you shot 30fps 1/60. With 24fps it’s a little bit less simple since 24/60 is 2.5 (not integer), but it’s close enough that if you sample or blend from 60fps to 24fps you’ll typically get a very acceptable result. Technically, 60fps 1/60 sec. video captures 100% of the movement in a second, just at a higher video sample rate, so when you reduce frame rate, you’re still working with all of the data, just not at a fully ideal division when moving to 24fps. If you shot 60fps 1/100, you’d be losing some of the motion in the frame and while 30fps would still look good, 24fps (particularly frame-blended 24fps) would start to suffer due to the non-integer division since frames would get mixed that lack all of the motion information for the frame’s interval, resulting in ghostly seams appearing where the missing movement exists. Granted, this could be exploited for visual effect, but it is undesirable in general.

60fps with a 24fps or 30fps edited product also grants you poor-man’s slow motion video: up to 1/2 speed for 30fps and up to 1/2.5 (or 2/5) speed for 24fps, without any sort of visual loss. 120fps and 240fps slow-motion are cool tricks, but they’re not available on cheaper consumer gear while 60fps is on loads of cameras, including the Panasonic G7 which I use religiously and which is now down to $500 for a kit (can do 4K@30 or 1080@60).

Conclusion

Shooting at 24fps is definitely the easiest way to achieve a “film-like” frame rate, and it is often used to great effect. My personal opinion is that 30fps looks cleaner and a “shutter speed” of 1/60 also looks cleaner. 60fps is a big increase in image data and many people still aren’t quite used to it (it looks like a 1990s soap opera to them) so it’s not the most economical choice, but it does grant the editor several artistic opportunities and extra flexibility that isn’t available at lower frame rates.
Noise reduction = loss of fine detail and reduced overall quality

I often advise people shooting video on Panasonic cameras to go into the picture profile settings and crank the noise reduction setting as far down as it’ll go…but why do I do this? Some people are perplexed by the suggestion because “noise” has become the greatest dirty word in the modern photographer’s world, a thing to be avoided at all costs because it makes your pictures look unprofessional and crappy.

By now, anyone reading this is probably familiar with my disdain for most YouTube photo and video “experts” due to their handing out of misguided or just plain wrong advice that newbies will blindly trust due to their subscriber and view counts. One of the things that’s basically assumed to be a hard fact in all discussions of how to shoot good video is that image noise must be avoided at all costs, usually leading to advice about lowering the ISO setting as far as possible to reduce the noise in the image. It’s not a bad thing to try to capture images with less noise as long as your overall photography doesn’t suffer as a result. A prime example of a contrary situation is shooting indoor sports with big telephoto lenses. which requires fast shutter speeds to avoid motion blur ruining the shot, so it’s better to use high ISOs to keep the shutter speed down and accept the added noise.

(Side note: the feature on your camera called “long exposure noise reduction” should be left on at all times. Long exposure photography suffers from unique sensor heat noise that can only be “caught” at the time the picture is taken. It works by closing the shutter and taking an equally long exposure to the photo you just took, then smoothing over any non-black pixels seen in the “dark frame.” It can profoundly increase the quality of your long exposure photography if you have the time to wait for it to do its magic.)

It’s true that noise can make an image look bad and sometimes renders it unusable (shoot in ISO 25600 on a $500 camera and you’ll see what I mean.)

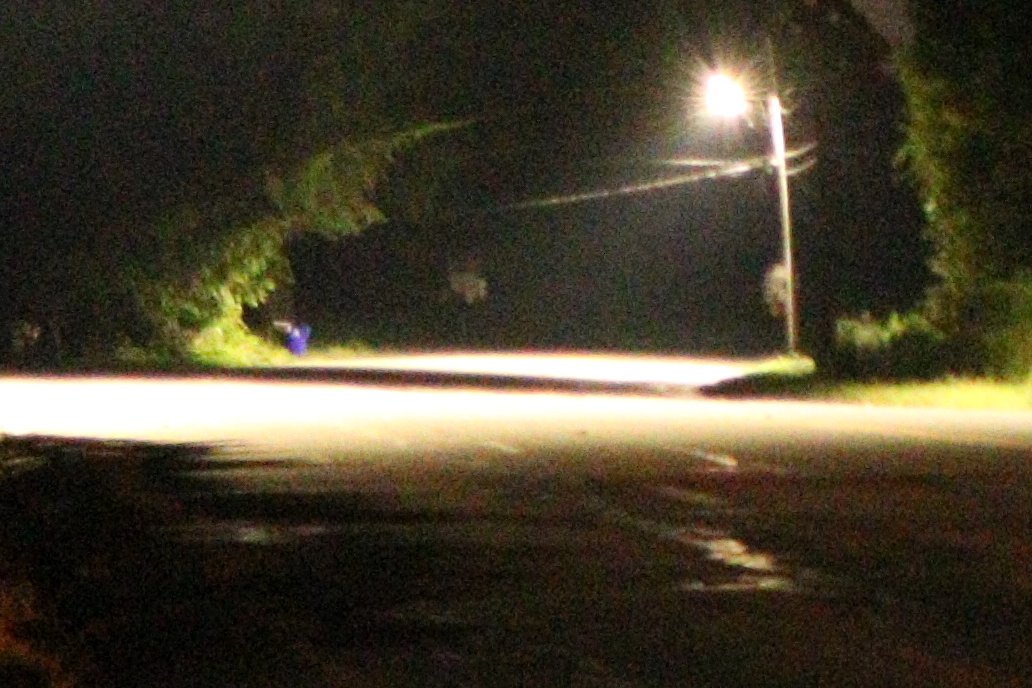
ISO 6400 1:1 crop to show image noise problems
ISO 6400 1:1 crop from a Canon EOS Rebel T6i/750D. Noise clearly makes this image look worse, though not unusable.

Referring to “noise” is a little bit too generic, though. Noise is an unavoidable phenomenon in imaging, no matter how good your camera gear is. Yes, less apparent noise tends to make a photo look better. What’s missing is this crucial distinction: there’s a big difference between stopping noise from being captured and removing noise from an image that’s already been captured. Reducing the captured noise can be achieved with larger sensors, lower ISO settings, and newer technology (such as BSI CMOS sensors) that does a better job of capturing light with less noise, but even with a huge sensor at ISO 100 and a ton of light available, you’ll still have some noise in the image because of the unavoidable random behavior of photons.

Most cameras that aren’t super cheap can shoot photos in two formats: JPEG and RAW (and usually an option exists to shoot both at the same time.) JPEG shooting gives you a fully processed image while RAW is literally the raw sensor data in all of its sometimes unnecessary detail. There are a few reasons that RAW files give photographers a lot more latitude to make changes after taking a photo, but the one that’s relevant to this discussion is a complete lack of in-camera processing in a RAW file. Part of in-camera image processing usually includes some noise reduction processing.

How does noise reduction work? There’s a lot of math and science stuff involved, but the simple version is that the image processor looks for individual pixels that are significantly different from their neighboring pixels and “smooths” (blurs) over them using the values of the neighboring pixels to take a guess at what would have been in that pixel’s spot if the noisy pixel wasn’t there. (Side note: this is how “hot pixel removal” or “dark frame subtraction” works, too: fill in the stuck pixel with a mix of neighboring pixel values so it doesn’t look like a hot pixel.)  This can improve the apparent quality of an image, particularly if the image itself is pretty large and it’ll be shown as a much smaller image, such as a 4×6 print or on a smartphone screen, which is a big reason that smartphone photos use heavy noise reduction and why smartphone photos can sometimes look so good on a smartphone screen that it seems like buying a “real camera” would be a complete waste of money. Zoom in a little on that beautiful smartphone picture, however, and the picture starts to fall apart due to the complete lack of fine detail.

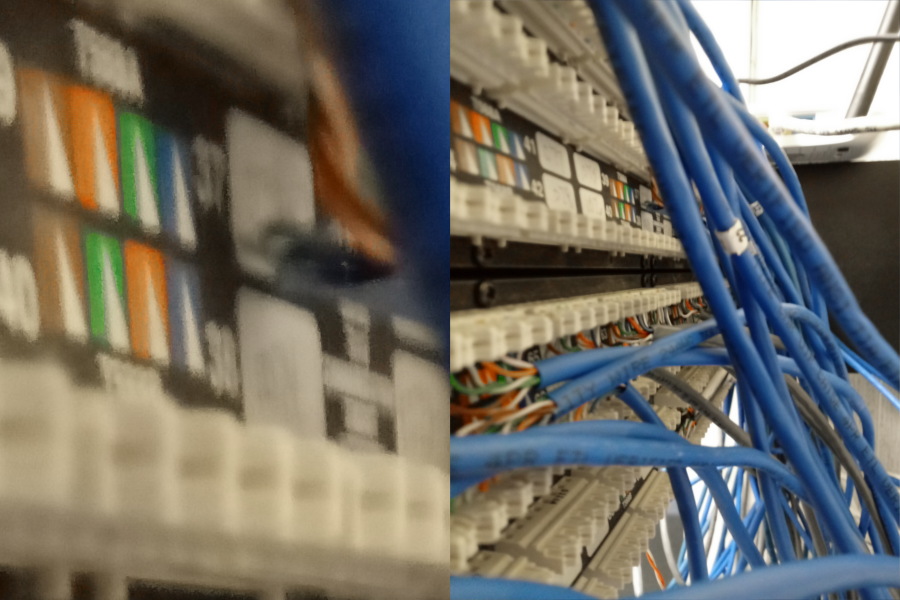
Smartphone picture and close-up to show heavy noise reduction artifacts
Smartphone picture and close-up to show heavy noise reduction artifacts. In this photo, leaving some of the noise would have resulted in a better image.

The benefits of shooting RAW photos or shooting video with in-camera noise reduction minimized become clear when you see some examples. As with all things, use of noise reduction is a trade-off. Sometimes the noise really is so distracting that the image looks better with noise reduction. Even in those cases, you’re better off doing the noise reduction in software rather than letting the camera do it. Camera processors have limited power and must get the work done in a very short amount of time, but your computer is more powerful, has no such time constraints, and can use much better algorithms to process the noise away. Any RAW image developing program can do NR on photos; for video, Adobe After Effects has a noise removal effect that can be very helpful. Ideally, you don’t want to do any NR at all, so turn it off as much as your camera allows and only use NR when the image noise is so bad that the image suffers heavily as a result. The flip side of this advice is that turning off NR (particularly for video work) can greatly increase your apparent production value because of the amount of fine detail that’s retained.

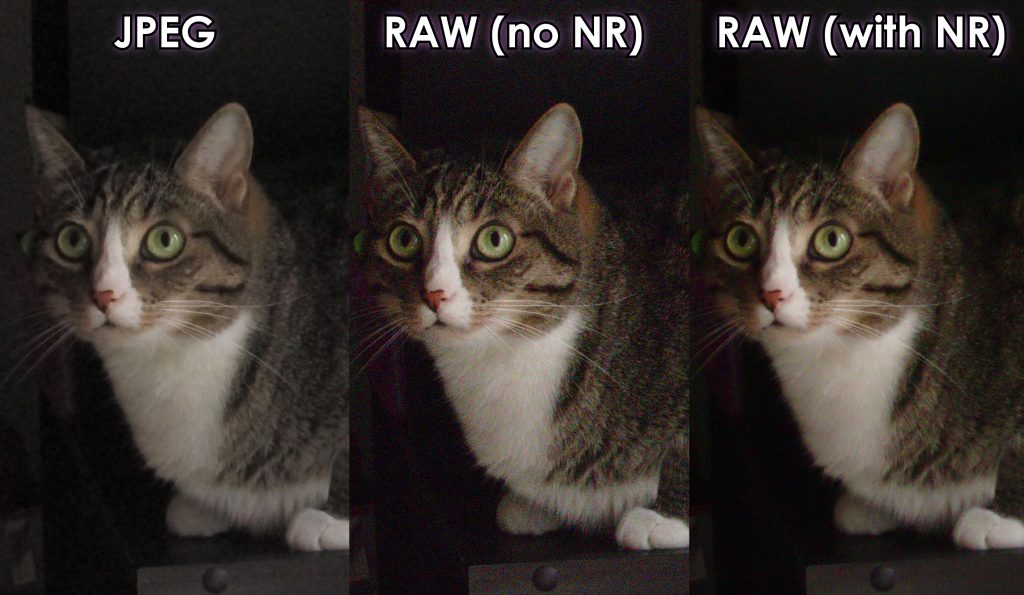
JPEG vs. RAW with and without noise reduction
JPEG vs. RAW with and without noise reduction. The cat’s fur is clearer with no NR. Taken on a Canon PowerShot A3400 IS with CHDK. (Click to see the full image.)

Why is a smartphone camera “smarter” than a DSLR?

Smartphone cameras and DSLR/mirrorless cameras are nothing more than tools to capture an image. With the dedicated camera being so much more expensive than a smartphone, you’d think the phone would do a worse job, but phones seem to actually focus and expose better than a DSLR under the same circumstances. Why is that? There are several factors involved.

Focusing on a subject is the first thing that comes to mind because it’s one of those things that easily ruins your photos if it’s off by even a little bit. Why is focusing so much better on a smartphone camera? A smartphone has a much larger depth of field comparable to a strongly stopped down DSLR, which means that the phone’s focus is much more forgiving. Phones also have wide angle lenses while DSLR lenses can be all sorts of different focal lengths; a wider angle lens has more acceptable focus depth and reduces the expected detail visible for anything that’s not close to the phone. Phones are designed to try to focus on faces and objects that are larger in the frame while a DSLR often has a lot of different focus modes and options. If you set a DSLR to a focus mode combination that’s similar to the tuning of a smartphone, the focus will work more like a smartphone.

Image exposure issues (too bright or too dark) are another situation where a phone seems to do a better job, but whether this is true or not is entirely dependent on the DSLR exposure metering setting. Most non-phone cameras come with a general “evaluative” metering set by default which tries to expose properly for everything in the frame. This can be changed to other methods such as spot metering which exposes based on a very small spot in the center of the frame. Many dedicated cameras can do face tracking exposure, object following exposure, and sometimes zone exposure which exposes for a portion of the frame that you select in advance. Phones generally favor faces and larger objects because phones are most often used to photograph people and close objects, so they will tend to make better exposure choices by default (such as not darkening due to a bright open window behind the subject) for such objects than a DSLR in the default evaluative metering mode. DSLRs are used for every kind of photography imaginable from macro to long zoom and from landscapes to portraits to product shots, so they require additional configuration to optimize for whatever unique shooting conditions are being faced. Cameras aren’t psychic. Set the DSLR to a similar mode such as face tracking metering and it’ll behave in a similar manner to a smartphone that does the same.

DSLRs and mirrorless cameras are much more capable tools than a smartphone camera, but you need to understand how to configure and use them for each unique shooting situation to get good results.

Why do so many YouTube vloggers use DSLRs instead of camcorders?

If you’re wondering why stills cameras such as DSLRs and mirrorless cameras are sometimes used for video rather than video-centric camcorders, there are a few reasons.

The biggest by far is the larger sensor size in most stills cameras. My cheap Canon camcorder has a 1/4.85″ sensor which results in a “crop factor” (a number used to represent the reduction in size relative to a full-frame 35mm sensor, so 2x crop means 1/2 the surface area) of 11.68x, while my Canon APS-C DSLR has a crop factor of 1.6x, over ten times larger than the camcorder’s sensor. As a general rule, larger sensor surface area results in more accurate sampling of light hitting the sensor, which in turn means less image noise and higher image quality, though the details of sensor size are more complex than we have room to discuss here. Larger sensors also make it far easier to obtain shots with shallow depth of field, where the background elements are heavily out of focus and the in-focus subject “pops out” by comparison, an effect which is generally pleasing to the eye and is very common in portrait photography.

Another reason is access to interchangeable lenses. Camcorders have permanent optical systems that can’t be changed, so the user is stuck with the engineering trade-offs made by the company when designing the system. Interchangeable-lens cameras like DSLRs allow the user to change the entire optical system beyond the sensor to achieve different results. One huge advantage of this is access to “fast primes” which are lenses with a fixed focal length and a very wide aperture, letting in tons of light and enabling extremely shallow depth of field effects. Prime lenses generally have superior image quality over zoom lenses, and all camcorders tend to be zoom lens systems with a very large zoom range. Primes can also be very cheap despite this high image quality. The “tack sharp” look of a properly utilized fast prime lens is an extremely attractive feature and is considered by many to be mandatory for anyone using a DSLR for filmmaking. Beyond the fast primes, the ability to change to different types of zoom lenses is also useful because (as a general rule) longer range between the widest and longest focal lengths on a zoom results in lower image quality overall. For those with thousands of dollars to spend on a lens, a DSLR enables the use of lenses manufactured for exceptional image quality such as the Canon “L” lenses, which tend to be over $1,000 each. Camcorders rarely have optical systems with the level of quality that such premium lenses provide.

A third reason is simply that of trends. DSLR filmmaking has been a big trend since the release of the Canon 5D Mark II included decently useful video capability in a relatively common full-frame camera for the first time. As this excellent video capability filtered down to lower and lower lines of DSLR, the ability to use DSLR cameras to make professional videos reached more people and the other features mentioned above made these cheap DSLRs very attractive to aspiring filmmakers. It was a novelty when the 5Dmk2 landed that caught loads of attention and today it’s largely fueled by the momentum of the trend. Which leads me to…

Why is a camcorder still a good choice? Why do I often recommend camcorders over DSLRs to so many people with $1,000 and the need to shoot videos? Why would you want to AVOID DSLR or mirrorless cameras for video work?

Camcorders are designed for video first and photography a distant second. DSLRs and mirrorless cameras are still photography-centric devices despite being more and more video-friendly. The ergonomics of a camcorder are set up with video shooting in mind. Camcorders are generally more compact than DSLRs and some mirrorless camera setups. Camcorders tend to have long zoom ranges already built in and the lenses used tend to be quite good since they’re permanently installed. The smaller sensors in most camcorders tend to result in more in-focus area and much more forgiving and accurate auto-focus, making focusing dead simple compared to most DSLRs. Camcorders have smaller sensors which means longer battery life and no risk of sensor overheating from prolonged shooting. Stills cameras often have a 30-minute video recording time limit thanks to an extremely stupid EU tax on video camcorders that desperately needs to be repealed. Crucially, video camcorders have full control of the zoom system through a small rocker on the camcorder body itself AND if the camcorder has remote control functions, the zoom can be controlled remotely. DSLR cameras can’t control lens zoom due to the nature of the camera: every lens has a different zoom capability (or none at all.) There are “remote servo” kits that add electronic zoom control to a DSLR video rig, but they’re not exactly user-friendly things to configure and they’re not cheap.

There are a lot of people using DSLR cameras that should be using camcorders, but the combination of trendy momentum plus access to shallow depth of field, lower image noise, and interchangeable lenses means that the DSLR video craze is here to stay.