DVD Slideshows in the 2020s: Large Photos Make DVD Software and Players Choke!

DVD Format History

The DVD (digital video disc) format has been around since the 1990s, and while Blu-ray ultimately took over when high-definition video became widely supported, the venerable video DVD is still the go-to format of choice for a lot of purposes. Every Blu-ray player and disc-based game console can play a DVD, not to mention every computer that comes with a DVD drive (most computers built from about 2008 to 2017 come with a DVD burner), and DVD players for televisions have been sold for well over two decades now, so it’s a very reliable way to hand off videos to people of all levels of technical expertise. I still offer DVDs for sale through the Jody Bruchon DVD shop and Redbox is clearly making enough money to stay in business as well.

Memorex DVD-R recordable media
Hello DVD-R, my old friend

I’ve been creating DVDs for a long time, both personally and for Gazing Cat Productions clients, and I’ve pretty much seen it all. DVD player compatibility is always a major concern, but it’s pretty much impossible to burn a DVD that works with all players. The earliest DVD players came before DVD-R media was available and DVD+R media wasn’t officially added to the DVD specification until 2008. DVD-RW is notoriously troublesome in non-RW drives, too. (If you want a complete overview of DVD recordable formats, Wikipedia has very good summaries.) Suffice it to say that DVD players can be grouchy about certain DVD disc formats, so DVD-R is the only reliable choice…and yet, a small number of players out there won’t even work with that. There are a whole host of pitfalls in the authoring and encoding of the data that actually goes ON those discs, too, which leads us to today’s absurd first-world problem.

The Customer Drops Off

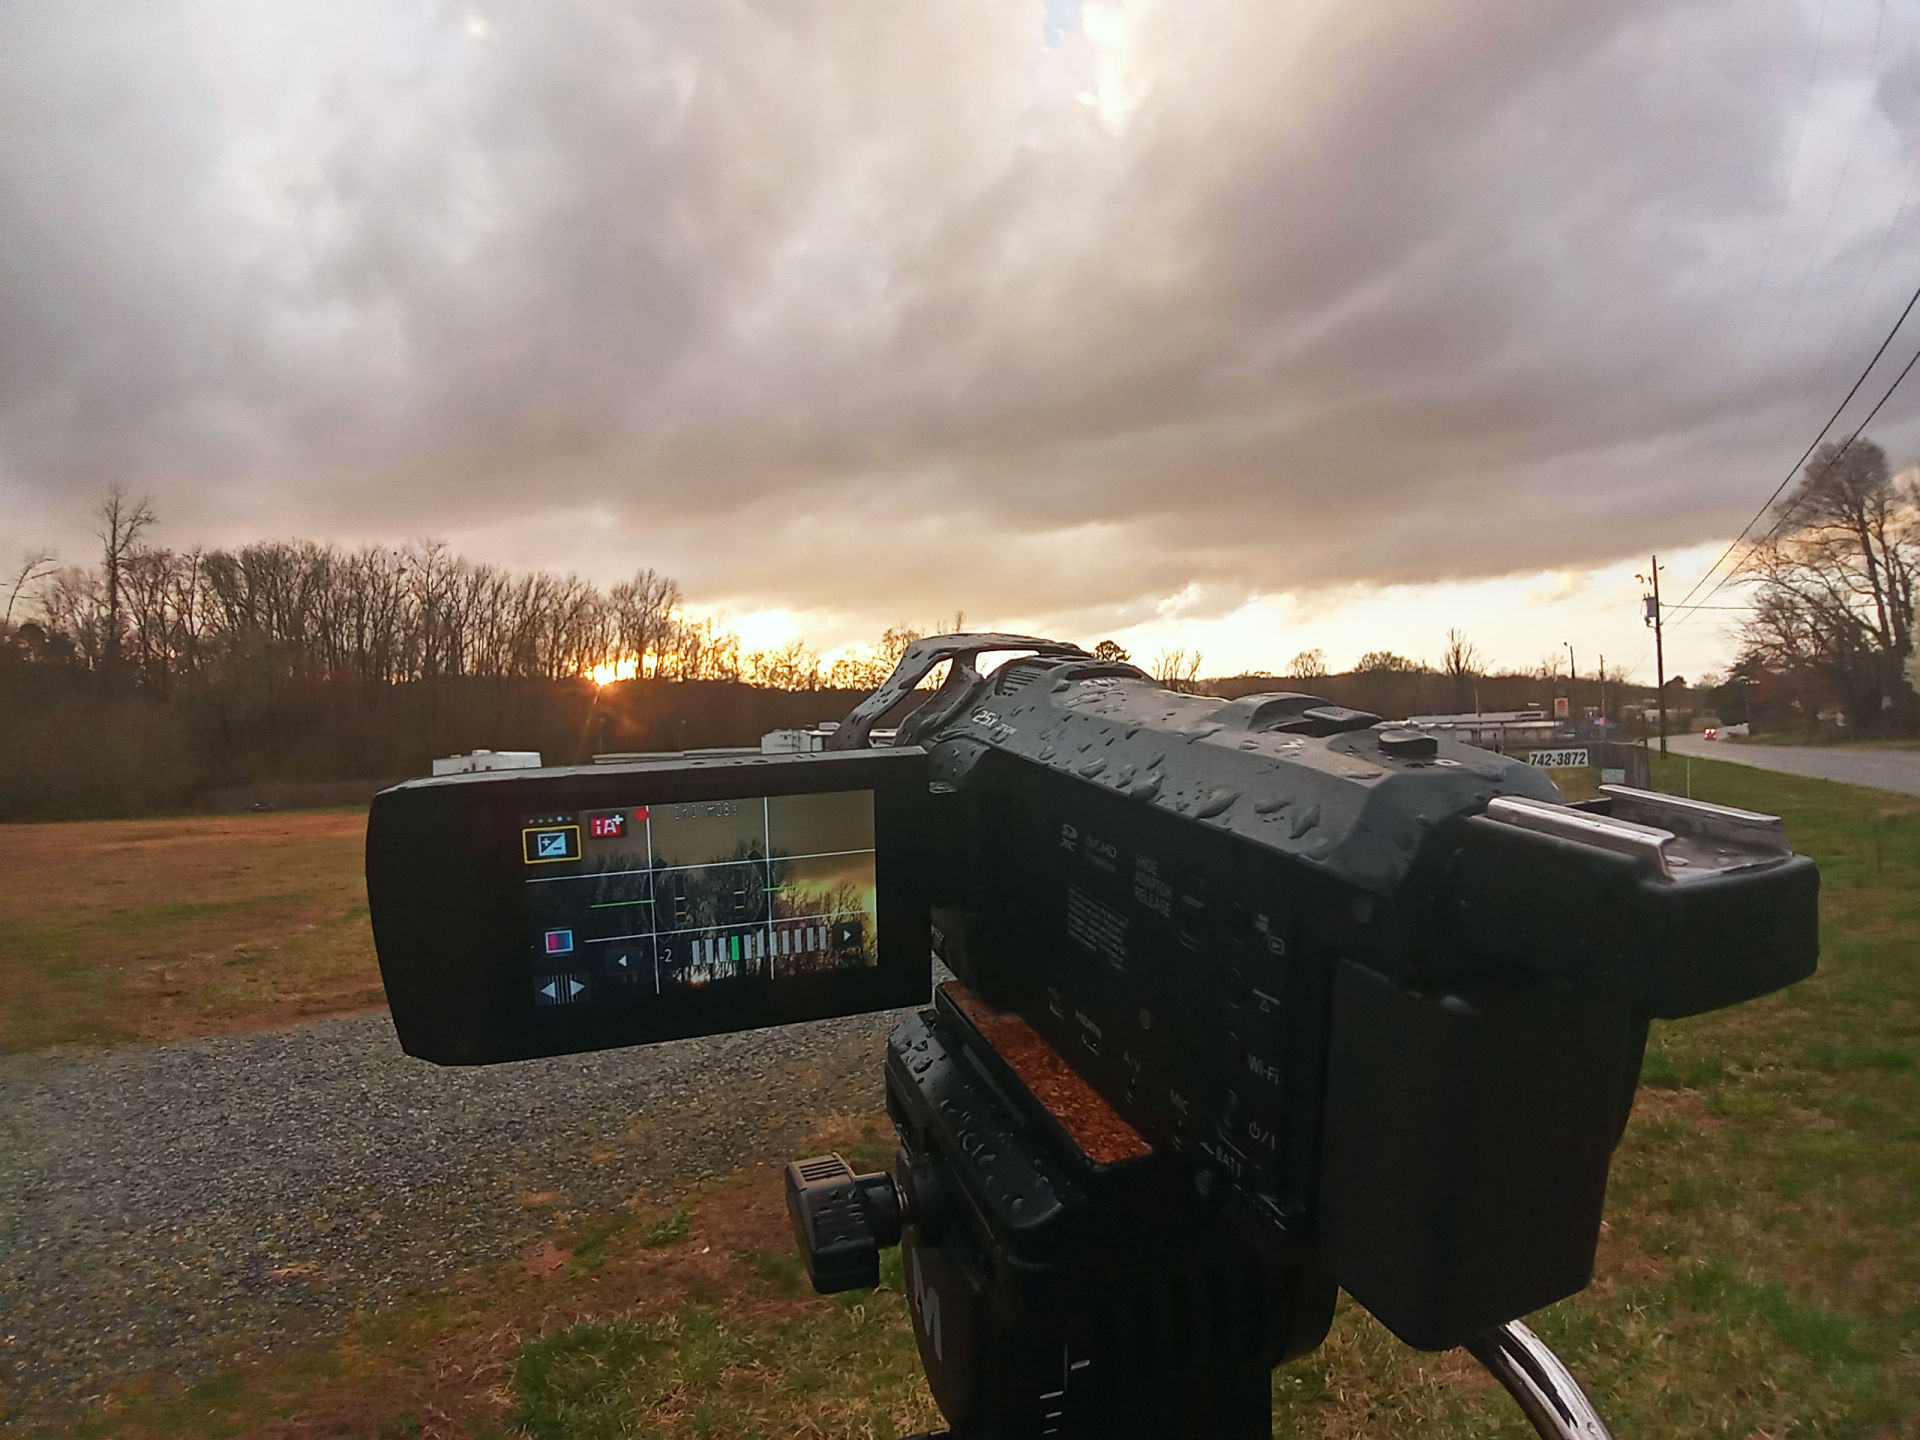
A gentleman brought a DVD to my doorstep. It contained a bunch of JPEG image files that he was trying to use as a slideshow for a person who had passed away, but the DVD player wouldn’t play them properly. I created properly authored video-format DVDs out of the JPEG images and they seemed to play OK on the computer, but because there are hundreds of images, I didn’t watch the whole slideshow; I only confirmed that the DVD auto-plays and loops properly, and a few photos worked OK. The computer seemed to have no problem at all with the DVD media. I gave him the media along with a warning that DVD compatibility can be an issue and that if he has any problems, I want to know.

The Customer Had Problems

The DVDs worked on his computer as well. His Blu-ray player, however, would loop after only a few photos. I’d never seen anything like this before. If a DVD plays at all on the player, it generally plays exactly as it does on the computer. This was an exception, and it didn’t make any sense. Did I check a box I shouldn’t have? Did I accidentally set a DVD command that I shouldn’t have? Did I use the wrong burning mode? I always run a verification pass after burning, so the data should be fine…right? What has changed?

I tried so many different burn options…and none of them helped

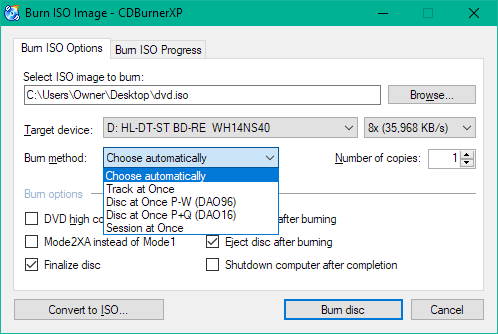
I ran through a bunch of possibilities and achieved the same failure every time. Disc-at-once vs. track-at-once vs. session-at-once: no dice. Burn speed: no dice (and it shouldn’t be a problem anyway). DVD high compatibility mode: no dice. All of these burning options failed to change anything. Re-authoring the DVD also resulted in no change. I was pretty screwed. I thought I had tried everything and it would go down as one of those random things I’d never find an answer about…but then, after the customer visited and wanted a status update and was eager to get their player back, I re-visited the problem and put on my “what have I missed?” troubleshooting cap.

The player itself probably wasn’t the issue. The DVD burning method and options weren’t the issue. The DVD-R format wasn’t the issue. The DVD authoring work I did wasn’t the issue. What’s left?

Something About the Picture Files

I noticed that the thumbnails weren’t loading for some of the pictures, but I figured that’s not a problem because they open up just fine. I decided to make the DVD slideshow video myself in an editor instead of letting the (fantastic and free!) DVD authoring program DVDStyler produce the slideshow for me. That’s when I got an error message that tipped me off to the actual problem (paraphrased): “[4 images]: the dimensions are too large to import.” I looked at the files and noticed that they were the same ones with no thumbnails…and that’s when I opened one and noticed the actual problem.

These images were over 20,000 pixels wide. They were all high-DPI scans of old pictures and the resolution was massive. Several of the others were 12,000 pixels wide. Scaling down the 20,000-pixel images made them import into Premiere Pro, but any attempt to export the images would crash Premiere hard. It quickly became obvious that the extreme resolution of these images was responsible for all of my problems. DVDStyler uses the open source video processor FFmpeg to create the DVD video, including mixing photos into a slideshow video, and that program doesn’t handle such high resolutions very well.

The end result was a DVD video that became corrupt where the huge pictures were supposed to be; the computer players will skip the corruption, but the standalone player owned by the customer would immediately assume that the corruption was the end of the stream, causing it to kick back to the auto-play loop I had set up. This is why the customer was saying that it would play only a few pictures before looping.

DVDStyler title 1 loop dialog
DVDStyler project where Title 1 loops back on itself when the stream ends

Scaling Down This Operation

I used the excellent and free image viewer and simple editor IrfanView to batch resize all of the images so that their “long side” was 1920 pixels maximum, with the option checked to not resize smaller images. This limited all of the images to a resolution that I knew my tools could handle…and that was the end of all my problems! The size of the images being fed to the slideshow maker wasn’t even something I thought of as a possibility until Premiere complained about the pictures. Sometimes the solution to your problem is to walk away and re-examine it from scratch.

How Big Are These Pictures?

It’s amazing how the limits set in the past can affect the future. To put the colossal size of these images into perspective, the highest-end digital cameras in the early 2000s could only take photographs up to about 4 megapixels. An entry-level DSLR camera in 2010 would have 16 or more megapixels of resolution, and 20MP-24MP was standard for entry-level gear by 2020. High-end monsters like the Fujifilm GFX 100S have reached 100MP and beyond, and this is also where the camera technology of today (2022) meets the images I was given. The resolution of a good photo scanner is higher than that of a typical digital camera, and with cheaper photo scanners offering interpolation (also known as “up-sampling”) to higher resolutions than they physically support, it’s very easy for a casual user to “turn the knobs to 11” in the assumption that they’ll be capturing their photographic memories in the highest quality possible.

The Interpolated DPI is a Lie

Everything beyond the actual resolution of the scanner is fake, created the same way that you’d create it if you dragged the image into an editor and made it a higher resolution (you can’t add detail that doesn’t exist in the original data, only guess at what might have been there). The interpolated image isn’t any better, it’s just much bigger, pretending to be as detailed as a GFX 100S photo when it’s not.

We’re Reaching These Limits Anyway

The resolution limits of Premiere Pro and FFmpeg are quite high. They are unlikely to be encountered by the vast majority of people using those programs, especially since they’re made for working with videos instead of photography. Most video cameras nowadays offer 4K video resolution options, but high-end video cameras exist with up to 8K of video resolution. This sounds like a lot (and make no mistake, it is a lot of pixels) but when you reduce the frame size to a megapixel count, you can start to see why video tools aren’t made to handle such massive images (list sorted by megapixel count):

  • Full HD (1080p) video is about 2MP; most common computer monitors, laptops, tablets, phones, and televisions support this resolution or lower
  • 4K video is 8.29MP; more expensive digital devices and video cameras support this video resolution and nothing higher
  • Entry-level DSLR/MILC cameras are 20MP-24MP, at least 10 times more pixels than your average television or computer or phone or tablet  can show
  • 8K video is 33.1MP and is the highest resolution offered by any digital video camera I am aware of, with almost no screens supporting this resolution natively at all
  • Professional DSLR/MILC cameras get closer to 50MP, leaving the resolution of even 8K video in the dust
  • Recent cell phones are 48MP-64MP, but there’s a catch. With the switch from traditional Bayer sensors to quad Bayer sensors, phone megapixel counts are skyrocketing, but they’re also hitting limitations (primarily the limits of diffraction) that mean you don’t actually get 64MP of detail…but the raw number is still high, so here it sits!
  • The Phase One IQ4 medium-format camera is 150MP and costs as much as a fancy pickup truck!
Panasonic VX870
4K video…also known as 8 wet megapixels

This Was Not What They Planned

It’s fairly obvious that while 8K is the pinnacle of video resolution, it’s nothing compared to what you get out of a modern photo camera. It’s not surprising that tools created with 4K in mind and 8K as a maximum don’t like to be fed “12K” images. In fact, the scanned photos that caused me all of this grief reached as high as 20,000 pixels wide (“20K” if you prefer) and there’s no way that these video tools ever considered that as a possibility when they were written…and why would they? Your devices probably can’t show more than Full HD (“2K”) in the first place, so why even consider 20K as a possibility?

Think about the original problem that bought us to all of this crazy discussion: I tried to make a slideshow video on a DVD. It’s not an uncommon task. People do it all the time. FFmpeg and Premiere Pro are both designed to take images and pretend they’re video clips, and they do that quite nicely. People make DVDs with picture slideshows all the time using these tools, and have for well over a decade.

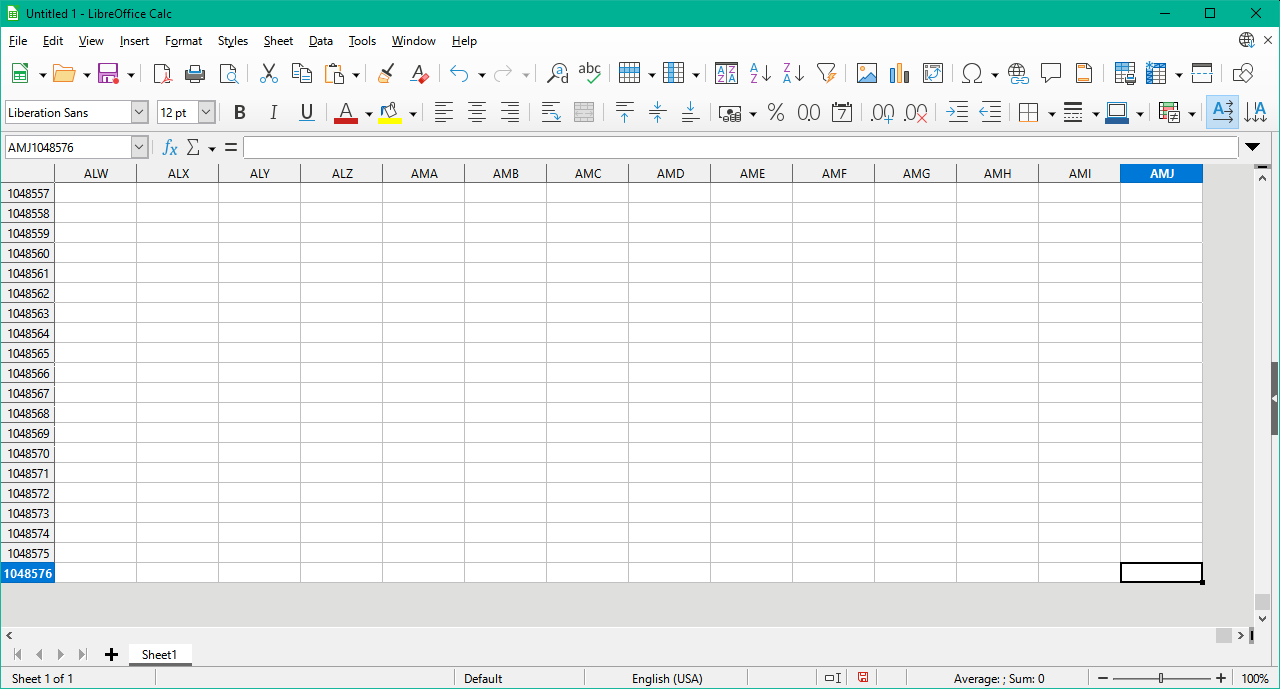
The problem is that our technology evolves and our tools don’t necessarily have to evolve with it until it becomes a real problem. A lot of assumptions are baked into the software that we use on a daily basis and the vast majority of us will never run into the wall that those assumptions put in our way. Years ago, I noticed that LibreOffice Calc would let me scroll down to row 65,535 (the limit of an unsigned 16-bit integer in programming) but I’ve never tried to make a spreadsheet in Calc with more rows than that. Likewise, I don’t have a single photo with a higher resolution than 24 megapixels, so I’m not likely to try to feed a video editor with a photograph I’ve taken that’s any bigger than that. The limits weren’t a problem…until they were. Surely I’m not the first person that’s tried to pull up a dump truck full of pixels to these programs and expect them to take the load gracefully, but at the same time, this scenario is also exceptionally rare.

The LibreOffice Calc cell limit seems to have been extended to reach cell AMJ1048576

Should these limits have been put into the software? Should they be removed now that I’ve run into them and they caused me a very real problem and ruined the product I delivered to the customer? The answers are not a simple “yes” or “no.” Software limits are often unavoidable because the hardware that runs it has limits, like the Calc row limit I explained earlier.

Software Limits Are Often Trade-Offs

Software is a constant struggle to maximize speed and efficiency without sacrificing correctness and capability, but when it’s faster to keep track of a counter with a 32-bit unsigned integer and you don’t see why anyone would ever need to count more than 4,294,267,295 for that counter anyway, you’re going to choose that “big” limit, and you won’t care that it might mean 12K video isn’t supported when 4K hasn’t even been created yet. Ten years later, some weirdo tries to feed a 96MP scanned photo image to your program and it chokes, but your more efficient choice still works for the pinnacle of video technology: 8K resolution. This leads into the second question about changing…

Should The Software Change?

It’s hard to fault the authors of the software for not changing to suit the extreme that I tried to force onto it, especially when it makes every other use case faster. The vast majority of digital cameras out there take photos at or below 24 megapixels and 8K video is 33 megapixels. It doesn’t make a lot of sense to hurt the 8K or less use cases just so I can feed unreasonably huge photos into the software on extremely rare occasions. If video continues to creep up in resolution then things might be different, but the value in going from 4K to 8K is not very high as-is, so 12K video is not likely to be a concern for a long time to come. Perhaps they’ll be forced to change the software, but it will probably come at the expense of performance for all of us, as such improvements often do.

Returning to the start (as all good stories do), the correct answer to this crazy exception is to treat it as a crazy exception and work around it. I’d love to just be able to shove pictures at DVDStyler and get what I want out the other end, but I’m one user out of millions in the world that will never run into this problem. I don’t want the program to become slower for this once-in-a-lifetime (I hope) use case. I don’t think DVDStyler or FFmpeg or Premiere Pro should change to make this problem go away.

Or at least, not yet.

When video and images get to the point that it’s a more mainstream issue, it’ll be an appropriate time to change. Until then, I’m happy that I can work around it with IrfanView’s batch processing on the wild chance that I ever have this problem again.

I hope that you’ve found this discussion to be interesting and informative. Feel free to leave your thoughts in the comment section below. Comments are moderated and don’t appear immediately, but I’ll approve them as quickly as I can.

Full-frame and large-sensor cameras suck

I’ve been thinking about saying something on this topic for a while. I held off because it’s going to make people even more angry, but I was talking to an old photographer about this issue today and I figured I may as well go for it. Grab your precious EF mount lenses and your pitchforks, because this is where I drop a stinker on the Holy Grail of Cameras™, the full-frame video camera (and APS-C and medium format while I’m at it.)

Cameras with larger sensors are a real pain in the ass. I’m sure the number one thing that rushes to your mind as you try to predict my complaints and plan your angry retorts is the size of a full-frame camera, and that’s definitely true: the larger your sensor, the larger the camera body has to be. There’s no way around that fact. It’s a big sensor and it needs a lot more in the way of life support than a tiny sensor. Unfortunately, the size issue extends far beyond the camera body itself.

I mean FAR BEYOND THE CAMERA.

Canon photographer with Canon EF 500mm f/4L IS USM Super Telepho
Canon 500mm f/4L IS USM lens. Licensed under Creative Commons CC-BY-2.0; unmodified original photo, credit Mike L. Baird, Flickr link
Olympus 300mm f/4 IS PRO lens in use
Olympus 300mm f/4 IS PRO lens (600mm equivalent) on a micro four-thirds camera (sensor size 1/4 of a full-frame sensor.) Shamelessly ripped from B&H Photo, buy it here so they don’t sue me!

The lenses shown above are wide-aperture super telephoto primes and the first relatively close (in 35mm equivalent focal length) I could find photos of in a person’s hands. The top lens is a cannon of a lens (pun totally intended) on a Canon full-frame camera; the bottom is an Olympus pro lens on a micro four-thirds camera. Notice how the entire Olympus lens would fit in the area between the Canon lens support on the tripod and the Canon body. The Olympus is a 100mm longer lens in 35mm equivalence, too. In fact, the only area in which the Olympus is “inferior” is producing a shallow depth of field at f/4. Because the micro four-thirds sensor is one quarter of the size of a full-frame sensor (which results in a crop factor of 2.0), the optics don’t have to be nearly as big to achieve the same subject framing and gather the same amount of light, but the fact is that a 300mm focal length is not 600mm and doesn’t work like 600mm; that’s just the 2.0x crop making it work that way, but all the calculations for depth of field will still work based on the true 300mm focal length.

Side note: many people incorrectly apply the crop factor to the f-number (aperture) value as well, but the crop factor doesn’t affect the way an f-number is calculated. The f-number is based on the size of the lens entrance pupil and the lens focal length, neither of which are affected by a sensor’s crop factor. Only apply crop factor to depth of field calculations and perceived amount of image noise.

The big sensor also comes with a big appetite. Larger sensors require more power, generate more heat, and (mostly due to higher megapixel counts) need more powerful image processors in the camera which means even more power and heat. That’s why a full-frame camera battery is bigger than many small-sensor camera batteries, yet can’t shoot as long. There is also a higher risk of the sensor overheating; some Sony full-frame mirrorless cameras are notorious for such overheating issues causing surprise shutdowns in the middle of shooting.

In short, cameras with bigger sensors require more money, more space, more strength and stamina to lug around and use, more power, are at higher risk of overheating. But would you believe that none of these things is my main problem with large-sensor cameras? It’s true. For the improved color quality and reduced noise, I can think of several situations where I would gladly work around all the weight issues and insanely high cost of bodies and lenses and terrible battery life. You can buy more batteries, and what are tripods for if not to hold your weapon of a full-frame camera? So if all of this isn’t what inspired me to write a lengthy article, what in the world is so bad that I’d rattle off this much text over it? Well, it’s simple:

Shallow depth of field sucks.

Look, I understand. I got a Canon T1i in 2010 and it was my first good camera. Before that, I lived in a photography world consisting of a tiny-sensor cheapo Polaroid i1036 point-and-shoot and whatever low-resolution camera phone I had at the time. Getting an APS-C DSLR was a mind-blowing experience, and having someone come over that also shot on Canon and offered to teach me and wielded the One True Lens, the famous “nifty-fifty” EF 50mm f/1.8, I was like a child visiting a huge candy store for the first time. I’d love to share my personal experiences with the often troublesome tool that is shallow depth of field. A picture is worth a thousand words, so…

A visual tour of discovering shallow depth of field

Poorly taken photo of computer books
Ah yes, my high-quality 2008 photography, courtesy of the very ugly FinePix A340. Everything about this picture is wrong.
Close-up shot of a Christmas tree and ornaments
Photo #438 from my Canon EOS Rebel T1i with the kit lens attached. Classic “I have a fancy camera, gonna shoot some plants” shot, but still way better than that travesty of red books.
Canon 50mm f/1.8 lens box in a car
October 10, 2012, I bought my first new lens: the 50mm f/1.8, with which I could get that shallow depth of field that’s SO TOTALLY COOL. I’m really moving into the ranks of the professionals with this bad boy! Sexy portraits, HERE I COME! (Holy crap, my car was so dirty. I’m ashamed now.)
Old warehouse building windows with metal gridwork
I took some of my absolute favorite photos with that 50mm f/1.8 lens…
Extremely shallow depth of field demonstration
…but soon discovered that the depth of field at f/1.8 can make it extremely hard to take in-focus photos of things. The depth of field, particularly at close distances, is insanely tight.
Seagull on the beach
Micro four-thirds is definitely the best balance between small and large sensor sizes. The extra focus depth from the sensor crop makes it easier to get the whole subject in focus. Panasonic G7, Olympus 40-150mm f/4-5.6 lens.

Proof (finally) that shallow depth of field sucks!

As most photographers (and videographers) tend to do, I eventually learned about stopping down for sharpness and for getting a deeper acceptable focus depth. It took a while for me to come around and realize that shallow depth of field is more likely to be a bad thing than a good thing. For portrait photography, a wide-aperture long telephoto lens is the epitome of awesomeness, but almost everything else needs more overall focus in the image.

The big epiphany hit me when I was replaying old episodes of Angry Video Game Nerd and bouncing around in the episode list a lot. I happened to jump between a few episodes where he changed his camera setup. From what I understand, James Rolfe used a Panasonic DVX100 camcorder with MiniDV tapes for a very long time, and the DVX100 uses a 1/3″ 3CCD sensor system. He upgraded to an HVX200 which used the same sensor system, then when he got the money for his movie he seems to have gotten something a little better with full HD (P2 cards for the HVX, maybe?) and then jumped up to something expensive with an obviously huge sensor. His video quality evolved, too: he went widescreen and then went full-frame widescreen. Unfortunately, I found that there was something wrong with the newer episodes that made them far less appealing to me, and it wasn’t just the somewhat more forced acting. Something bothered me, but I couldn’t pinpoint it. Maybe you can come to the same epiphany if you study the following three images which are in chronological order:

Do you see why the last one is worse than the other two? Take a long, hard look, then read on.

Backgrounds (and foregrounds) are important.

The third shot is worse because of the shallow depth of field. Until I saw these videos in the same watch session, I didn’t realize what was going on, but it stands out like a sore thumb ever since I noticed. The tiny sensors of the Panasonic MiniDV camcorders have a really large focus depth compared to a full-frame camera set up to take an identical shot at the same distance. You can very clearly read the “RUMBLE IN THE BRONX” poster behind him in the first shot, plus all of the other posters are about as clear as the lighting can make them. In the second shot, it’s the same story: you can see the mini arcade games, the cartridge boxes and end labels, and if you had a copy of the full 1920×1080 screenshot, you’d be able to make out the text on most of the end labels. The wall of stuff behind him is super important because it’s part of his character. Seeing game posters and games enhances the authentic feeling that the setting grants to the character.

And then there’s that third shot. That third, high-quality, shallow as hell shot. The games are unreadable. The boxes are unreadable. The colors mush together. Everything is so out of focus that it all blends into a mish-mash of “this stuff doesn’t matter.” Ironically, as the visual quality of the character experienced a meteoric rise, the perceptual quality of the show declined because the background that is an integral part of the character was rendered useless. This change first happened in AVGN episode 109, “Atari Sports,” and it never stopped. In a way, I should be grateful that this change happened. I grew a new and very powerful appreciation for the importance of backgrounds in photography and filmmaking.

Here are a few screenshots from one of my favorite films, Swing Girls (2004). Imagine how they would look with the backgrounds (and foregrounds!) lost to blurry out-of-focus swirls of bokeh, and how they’d have to be shot differently if the depth of field was a lot shallower. (Yes, this was shot on film, but the concepts behind depth of field and acceptable focus work the same way. Remember that Super 35mm film has a roughly APS-C sized frame; full-frame is significantly larger.)

Those mountains are gorgeous. Why am I not there? すごい
They’re in a junkyard. How do I know that?
How embarrassing that moment was for them. Good thing we can see the audience.
Is the audience clapping along important? Hmm…what if it was too out of focus?

Having the out-of-focus bits too far out of focus would have ruined these scenes. Being able to see what’s in a room or what other people are doing, even if not the main subject in the frame, is a crucial tool in visual storytelling. That’s not to say that they didn’t use some shallow depth of field effects…

It makes a lot of sense to thin out the depth of field in this shot since it’s basically a portrait…
…but even the shallow shots usually have enough focus depth to fill out the room and show off what’s around the subject. This room is a critical part of this character’s exposition and a shallow depth of field would ruin it.

With large-sensor cameras, it’s hard to achieve a deep depth of field without heavily boosting the ISO (or gain) which means adding a lot more noise to the image. The other alternative is having tons of lighting on hand, something which might be an option if you have a decently large budget and a heavily controlled environment to shoot within. For the rest of us, smaller sensors give great visual results that suit most of the stories we want to tell with far less effort than their full-frame counterparts. There are certainly some situations where the advantages of a large sensor can outweigh the negatives, particularly portrait-style shots and focus racking shots, but for everything else it just makes sense to stick to cameras with smaller sensors.

From the raw footage for my shot-in-one-hour short film, Cowbell Mafia.

Don’t give in to the hype. Each tool has its purpose. Full-frame cameras are a useful tool, but they are all too often idolized. You may really be better off with that cheaper mirrorless camera over that crazy expensive full-frame beast that your filmmaking peers are all swooning over.

Frame rates: should you stick to 24fps for “the film look?” Will higher rates improve video quality?

I was asked a technical question that deserves a long-winded answer, so here it is.

Should you stick to 24fps for “the film look?” Will higher rates improve video quality?


Frame rate is a little complex. Let’s ignore PAL’s 25fps/50fps to keep it simple. Most people are used to 24fps because it’s what film and movies have used for a very long time; 24fps is basically the slowest frame rate where movements still look natural. 30fps is generally associated with “video” as in “not film.” My videos are generally all edited in 30fps. A lot of YouTubers work with 24fps. As gamers and gaming videos have widely proliferated and bandwidth has become massively available, 60fps has also become fairly widely accepted, and there is a degree of realism in 60fps that isn’t present at lower frame rates.

The issue with higher frame rates is that they inherently force a minimum exposure time (what we call “shutter speed” even though there is no mechanical shutter in video) which is the reciprocal of the frame rate. You can’t record at 60fps with a 1/50 sec. “shutter speed” because you have to generate frames 60 times a second, not 50. Film has a frame rate of 24fps and a shutter speed of 1/48 sec. because the mechanical half-circle shutter would spin around such that it covered the film as it was advanced to the next frame and then opened up and closed when the frame was in place. On a modern camera, you can get extreme motion blur by using longer times than film’s 1/48 second, but only if you use 24fps or 30fps frame rates.

The beauty of 60 frames per second

Here’s why I would prefer to shoot 60fps 1/60 sec. all the way though: if you frame-blend 60fps 1/60 frames down to 30fps, you get the same exact video that you’d get at 30fps 1/30; if you didn’t use frame blending and instead used frame sampling, you’d get the exact same video as if you shot 30fps 1/60. With 24fps it’s a little bit less simple since 24/60 is 2.5 (not integer), but it’s close enough that if you sample or blend from 60fps to 24fps you’ll typically get a very acceptable result. Technically, 60fps 1/60 sec. video captures 100% of the movement in a second, just at a higher video sample rate, so when you reduce frame rate, you’re still working with all of the data, just not at a fully ideal division when moving to 24fps. If you shot 60fps 1/100, you’d be losing some of the motion in the frame and while 30fps would still look good, 24fps (particularly frame-blended 24fps) would start to suffer due to the non-integer division since frames would get mixed that lack all of the motion information for the frame’s interval, resulting in ghostly seams appearing where the missing movement exists. Granted, this could be exploited for visual effect, but it is undesirable in general.

60fps with a 24fps or 30fps edited product also grants you poor-man’s slow motion video: up to 1/2 speed for 30fps and up to 1/2.5 (or 2/5) speed for 24fps, without any sort of visual loss. 120fps and 240fps slow-motion are cool tricks, but they’re not available on cheaper consumer gear while 60fps is on loads of cameras, including the Panasonic G7 which I use religiously and which is now down to $500 for a kit (can do 4K@30 or 1080@60).

Conclusion

Shooting at 24fps is definitely the easiest way to achieve a “film-like” frame rate, and it is often used to great effect. My personal opinion is that 30fps looks cleaner and a “shutter speed” of 1/60 also looks cleaner. 60fps is a big increase in image data and many people still aren’t quite used to it (it looks like a 1990s soap opera to them) so it’s not the most economical choice, but it does grant the editor several artistic opportunities and extra flexibility that isn’t available at lower frame rates.

Noise reduction = loss of fine detail and reduced overall quality

I often advise people shooting video on Panasonic cameras to go into the picture profile settings and crank the noise reduction setting as far down as it’ll go…but why do I do this? Some people are perplexed by the suggestion because “noise” has become the greatest dirty word in the modern photographer’s world, a thing to be avoided at all costs because it makes your pictures look unprofessional and crappy.

By now, anyone reading this is probably familiar with my disdain for most YouTube photo and video “experts” due to their handing out of misguided or just plain wrong advice that newbies will blindly trust due to their subscriber and view counts. One of the things that’s basically assumed to be a hard fact in all discussions of how to shoot good video is that image noise must be avoided at all costs, usually leading to advice about lowering the ISO setting as far as possible to reduce the noise in the image. It’s not a bad thing to try to capture images with less noise as long as your overall photography doesn’t suffer as a result. A prime example of a contrary situation is shooting indoor sports with big telephoto lenses. which requires fast shutter speeds to avoid motion blur ruining the shot, so it’s better to use high ISOs to keep the shutter speed down and accept the added noise.

(Side note: the feature on your camera called “long exposure noise reduction” should be left on at all times. Long exposure photography suffers from unique sensor heat noise that can only be “caught” at the time the picture is taken. It works by closing the shutter and taking an equally long exposure to the photo you just took, then smoothing over any non-black pixels seen in the “dark frame.” It can profoundly increase the quality of your long exposure photography if you have the time to wait for it to do its magic.)

It’s true that noise can make an image look bad and sometimes renders it unusable (shoot in ISO 25600 on a $500 camera and you’ll see what I mean.)

ISO 6400 1:1 crop to show image noise problems
ISO 6400 1:1 crop from a Canon EOS Rebel T6i/750D. Noise clearly makes this image look worse, though not unusable.

Referring to “noise” is a little bit too generic, though. Noise is an unavoidable phenomenon in imaging, no matter how good your camera gear is. Yes, less apparent noise tends to make a photo look better. What’s missing is this crucial distinction: there’s a big difference between stopping noise from being captured and removing noise from an image that’s already been captured. Reducing the captured noise can be achieved with larger sensors, lower ISO settings, and newer technology (such as BSI CMOS sensors) that does a better job of capturing light with less noise, but even with a huge sensor at ISO 100 and a ton of light available, you’ll still have some noise in the image because of the unavoidable random behavior of photons.

Most cameras that aren’t super cheap can shoot photos in two formats: JPEG and RAW (and usually an option exists to shoot both at the same time.) JPEG shooting gives you a fully processed image while RAW is literally the raw sensor data in all of its sometimes unnecessary detail. There are a few reasons that RAW files give photographers a lot more latitude to make changes after taking a photo, but the one that’s relevant to this discussion is a complete lack of in-camera processing in a RAW file. Part of in-camera image processing usually includes some noise reduction processing.

How does noise reduction work? There’s a lot of math and science stuff involved, but the simple version is that the image processor looks for individual pixels that are significantly different from their neighboring pixels and “smooths” (blurs) over them using the values of the neighboring pixels to take a guess at what would have been in that pixel’s spot if the noisy pixel wasn’t there. (Side note: this is how “hot pixel removal” or “dark frame subtraction” works, too: fill in the stuck pixel with a mix of neighboring pixel values so it doesn’t look like a hot pixel.)  This can improve the apparent quality of an image, particularly if the image itself is pretty large and it’ll be shown as a much smaller image, such as a 4×6 print or on a smartphone screen, which is a big reason that smartphone photos use heavy noise reduction and why smartphone photos can sometimes look so good on a smartphone screen that it seems like buying a “real camera” would be a complete waste of money. Zoom in a little on that beautiful smartphone picture, however, and the picture starts to fall apart due to the complete lack of fine detail.

Smartphone picture and close-up to show heavy noise reduction artifacts
Smartphone picture and close-up to show heavy noise reduction artifacts. In this photo, leaving some of the noise would have resulted in a better image.

The benefits of shooting RAW photos or shooting video with in-camera noise reduction minimized become clear when you see some examples. As with all things, use of noise reduction is a trade-off. Sometimes the noise really is so distracting that the image looks better with noise reduction. Even in those cases, you’re better off doing the noise reduction in software rather than letting the camera do it. Camera processors have limited power and must get the work done in a very short amount of time, but your computer is more powerful, has no such time constraints, and can use much better algorithms to process the noise away. Any RAW image developing program can do NR on photos; for video, Adobe After Effects has a noise removal effect that can be very helpful. Ideally, you don’t want to do any NR at all, so turn it off as much as your camera allows and only use NR when the image noise is so bad that the image suffers heavily as a result. The flip side of this advice is that turning off NR (particularly for video work) can greatly increase your apparent production value because of the amount of fine detail that’s retained.

JPEG vs. RAW with and without noise reduction
JPEG vs. RAW with and without noise reduction. The cat’s fur is clearer with no NR. Taken on a Canon PowerShot A3400 IS with CHDK. (Click to see the full image.)

Will smartphone cameras soon replace the DSLR? (Spoiler: nope!)

Your brand new iPhone XS (haha, it literally says “excess” on the box!) takes videos and pictures that you think look AMAZING. Does this mean it’s time to ditch the DSLR or mirrorless camera and just shoot all your video and photos?

Nope! Not even close.

All optical systems are designed with a set of trade-offs. Smartphone cameras are extremely small, consume small amounts of power, and generate very little heat. This obviously is not avoidable because the camera has to fit inside of a phone with a relatively small amount of space and battery capacity. Phone cameras have relatively small sensors with the biggest ones being the same size as some of the smallest point-and-shoot cameras. Unlike even the cheapest point-and-shoot, however, there is no room for any sort of optical zoom mechanism and the tendency to take photos of close objects means that phone cameras only come with a wide angle of view, though the iPhone XS and XS Max come with a second “telephoto” lens on the back; the phone camera field is still evolving to try to overcome such limitations. The photos taken by a phone camera are generally of poor quality at sizes larger than a cell phone screen, with poor dynamic range and heavy mosaic artifacting due to the strong noise reduction algorithms used. Since none of the components of the optical system can be changed, the compromises made by the engineers are permanent. Clip-on lenses can be used to achieve some modifications, but the image quality is necessarily reduced further.

Picture of grid-like ceiling: That ceiling looks good from far...
That ceiling looks good from far…
Close-up of ceiling grid with ugly noise: ...but the noise and smoothing is far from good.
…but the noise and smoothing is far from good.

DSLR and mirrorless cameras have distinct benefits that are not possible to achieve on cell phone cameras. Interchangeable lenses allow the user to completely change the optical system beyond the sensor, making the compromises of one particular lens design less of an issue and greatly increasing flexibility and utility. You will never have a cell phone with a 800mm focal length, but a lens can be purchased for your DSLR to give it such a focal length. If you use a standard zoom with a fairly small aperture during the day and want better performance at night, you have the option to switch to a prime lens with a very wide aperture. The sensor size is much larger in a DSLR, meaning significantly less photon noise and a much cleaner picture.

Photo of fir tree needles. Shot on a mirrorless camera at twilight, ISO 1600, f/1.7
Shot on a mirrorless camera at twilight, ISO 1600, f/1.7
Your phone's camera can't take a photo like this. No phone ever will.
Your phone’s camera can’t take a photo like this. No phone ever will.

Even a compact point-and-shoot is superior to the camera on a phone. Though the sensor may be the same size, the extra space and increased battery capacity means that the system doesn’t have to make compromises as harshly as the cell phone camera. The lens system can have more elements and optical zoom. Heat and power consumption are less problematic. There is more space for an aperture mechanism to operate and there is room for an internal neutral density filter. There are dedicated control elements instead of a touch-only interface which makes operation of the camera much easier. Instead of an LED light “flash,” there is usually a real flash bulb.

Photo of a courthouse in downtown Pittsboro. Shot in 2018 with a Canon PowerShot G3 from 2003 and still looks better than anything your smartphone's camera can do.
Shot in 2018 with a Canon PowerShot G3 from 2003 and still looks better than anything your smartphone’s camera can do.

Cell phone cameras will never be able to come functionally close to DSLR cameras in any way, but does it matter? The best camera is the one you have with you, not the expensive fancy one you left at home. The convenience of a cell phone camera is undeniably its greatest asset, followed closely by the extreme ease of sharing your photos that it provides.

Buying a new camera: what should I get?

So…you want to join the ranks of the cool kids and buy a camera? Great! Let’s assume that you have about $700-$750 to spend, as I did when I got my first fancy camera. What camera should you get with this budget?

A solid answer depends on what you want to do and how skilled you already are. If you want a solid all-around camera that is good for both beginners and experts, the Panasonic G7 is a great choice. The G7 with 14-42mm stabilized kit lens is frequently on sale for $500 and the extra $200 can be spent on another lens such as the Panasonic 45-150mm stabilized telephoto or the Panasonic 25mm f/1.7 which is an amazing and sharp lens that is especially good for low-light situations.

Why the Panasonic G7 instead of a Canon or Nikon entry-level DSLR? Size, weight, cost, and advanced features. While Canon and Nikon DSLRs are great and may have better overall image quality (I have owned a Canon T1i and T6i myself), they are more expensive than a G7, they are way less convenient to haul around, and they are somewhat crippled in the features department. The G7 with kit lens feels like it weighs nothing compared to any Canon or Nikon DSLR and it is a significantly smaller camera, both in body and lenses. Paired with a holster bag that you throw over your shoulder, it’s easy to forget you’re even carrying a nice camera at all. There are several great lenses available for lower prices on the micro four-thirds system than comparable lenses on Canon/Nikon lens systems. The G7 shoots professional-quality 4K video while no Canon or Nikon below multiple thousands of dollars does that. The G7 has time-lapse photography (aka a built-in intervalometer), focus peaking for better manual focusing, overexposure zebras, a faster continuous shooting rate, much better controls (the two top dials and extra function buttons make a big difference) and the batteries last longer because the smaller sensor requires less power to use. After using my G7 for a week, I declared that I would throw my Canon in a river if I was forced to choose between the two cameras.

There are downsides, primarily related to the smaller sensor size, but unless you’re getting paid for your photos, you won’t really care about the small amount of added noise. Good photography/videography skills will make the smaller sensor mostly irrelevant and the upside greatly outweighs the downside. If you go professional with your photography then you’ll want to buy an expensive full-frame camera, but until then, don’t worry about sensor size and get the tool that empowers you the most.

If you want to see proof that skill is far more important than hardware, look up the DigitalRev series “Pro Photographer, Cheap Camera,” especially the Philip Bloom and The Strobist episodes (both are embedded below for your convenience.) You will be amazed what two literal toy cameras can produce in skilled hands.

Why is a smartphone camera “smarter” than a DSLR?

Smartphone cameras and DSLR/mirrorless cameras are nothing more than tools to capture an image. With the dedicated camera being so much more expensive than a smartphone, you’d think the phone would do a worse job, but phones seem to actually focus and expose better than a DSLR under the same circumstances. Why is that? There are several factors involved.

Focusing on a subject is the first thing that comes to mind because it’s one of those things that easily ruins your photos if it’s off by even a little bit. Why is focusing so much better on a smartphone camera? A smartphone has a much larger depth of field comparable to a strongly stopped down DSLR, which means that the phone’s focus is much more forgiving. Phones also have wide angle lenses while DSLR lenses can be all sorts of different focal lengths; a wider angle lens has more acceptable focus depth and reduces the expected detail visible for anything that’s not close to the phone. Phones are designed to try to focus on faces and objects that are larger in the frame while a DSLR often has a lot of different focus modes and options. If you set a DSLR to a focus mode combination that’s similar to the tuning of a smartphone, the focus will work more like a smartphone.

Image exposure issues (too bright or too dark) are another situation where a phone seems to do a better job, but whether this is true or not is entirely dependent on the DSLR exposure metering setting. Most non-phone cameras come with a general “evaluative” metering set by default which tries to expose properly for everything in the frame. This can be changed to other methods such as spot metering which exposes based on a very small spot in the center of the frame. Many dedicated cameras can do face tracking exposure, object following exposure, and sometimes zone exposure which exposes for a portion of the frame that you select in advance. Phones generally favor faces and larger objects because phones are most often used to photograph people and close objects, so they will tend to make better exposure choices by default (such as not darkening due to a bright open window behind the subject) for such objects than a DSLR in the default evaluative metering mode. DSLRs are used for every kind of photography imaginable from macro to long zoom and from landscapes to portraits to product shots, so they require additional configuration to optimize for whatever unique shooting conditions are being faced. Cameras aren’t psychic. Set the DSLR to a similar mode such as face tracking metering and it’ll behave in a similar manner to a smartphone that does the same.

DSLRs and mirrorless cameras are much more capable tools than a smartphone camera, but you need to understand how to configure and use them for each unique shooting situation to get good results.

Why do so many YouTube vloggers use DSLRs instead of camcorders?

If you’re wondering why stills cameras such as DSLRs and mirrorless cameras are sometimes used for video rather than video-centric camcorders, there are a few reasons.

The biggest by far is the larger sensor size in most stills cameras. My cheap Canon camcorder has a 1/4.85″ sensor which results in a “crop factor” (a number used to represent the reduction in size relative to a full-frame 35mm sensor, so 2x crop means 1/2 the surface area) of 11.68x, while my Canon APS-C DSLR has a crop factor of 1.6x, over ten times larger than the camcorder’s sensor. As a general rule, larger sensor surface area results in more accurate sampling of light hitting the sensor, which in turn means less image noise and higher image quality, though the details of sensor size are more complex than we have room to discuss here. Larger sensors also make it far easier to obtain shots with shallow depth of field, where the background elements are heavily out of focus and the in-focus subject “pops out” by comparison, an effect which is generally pleasing to the eye and is very common in portrait photography.

Another reason is access to interchangeable lenses. Camcorders have permanent optical systems that can’t be changed, so the user is stuck with the engineering trade-offs made by the company when designing the system. Interchangeable-lens cameras like DSLRs allow the user to change the entire optical system beyond the sensor to achieve different results. One huge advantage of this is access to “fast primes” which are lenses with a fixed focal length and a very wide aperture, letting in tons of light and enabling extremely shallow depth of field effects. Prime lenses generally have superior image quality over zoom lenses, and all camcorders tend to be zoom lens systems with a very large zoom range. Primes can also be very cheap despite this high image quality. The “tack sharp” look of a properly utilized fast prime lens is an extremely attractive feature and is considered by many to be mandatory for anyone using a DSLR for filmmaking. Beyond the fast primes, the ability to change to different types of zoom lenses is also useful because (as a general rule) longer range between the widest and longest focal lengths on a zoom results in lower image quality overall. For those with thousands of dollars to spend on a lens, a DSLR enables the use of lenses manufactured for exceptional image quality such as the Canon “L” lenses, which tend to be over $1,000 each. Camcorders rarely have optical systems with the level of quality that such premium lenses provide.

A third reason is simply that of trends. DSLR filmmaking has been a big trend since the release of the Canon 5D Mark II included decently useful video capability in a relatively common full-frame camera for the first time. As this excellent video capability filtered down to lower and lower lines of DSLR, the ability to use DSLR cameras to make professional videos reached more people and the other features mentioned above made these cheap DSLRs very attractive to aspiring filmmakers. It was a novelty when the 5Dmk2 landed that caught loads of attention and today it’s largely fueled by the momentum of the trend. Which leads me to…

Why is a camcorder still a good choice? Why do I often recommend camcorders over DSLRs to so many people with $1,000 and the need to shoot videos? Why would you want to AVOID DSLR or mirrorless cameras for video work?

Camcorders are designed for video first and photography a distant second. DSLRs and mirrorless cameras are still photography-centric devices despite being more and more video-friendly. The ergonomics of a camcorder are set up with video shooting in mind. Camcorders are generally more compact than DSLRs and some mirrorless camera setups. Camcorders tend to have long zoom ranges already built in and the lenses used tend to be quite good since they’re permanently installed. The smaller sensors in most camcorders tend to result in more in-focus area and much more forgiving and accurate auto-focus, making focusing dead simple compared to most DSLRs. Camcorders have smaller sensors which means longer battery life and no risk of sensor overheating from prolonged shooting. Stills cameras often have a 30-minute video recording time limit thanks to an extremely stupid EU tax on video camcorders that desperately needs to be repealed. Crucially, video camcorders have full control of the zoom system through a small rocker on the camcorder body itself AND if the camcorder has remote control functions, the zoom can be controlled remotely. DSLR cameras can’t control lens zoom due to the nature of the camera: every lens has a different zoom capability (or none at all.) There are “remote servo” kits that add electronic zoom control to a DSLR video rig, but they’re not exactly user-friendly things to configure and they’re not cheap.

There are a lot of people using DSLR cameras that should be using camcorders, but the combination of trendy momentum plus access to shallow depth of field, lower image noise, and interchangeable lenses means that the DSLR video craze is here to stay.

YouTube video experts don’t understand why flat/log footage on 8-bit cameras is a bad idea

UPDATE 2: An angry comment was left on this article where the writer seems to think that I’m against people using their phones to take video. While it is absolutely true that a phone is never going to be a great substitute for a proper camera or camcorder, that was not my intention. I think that people should make videos with whatever they have access to, and if that’s a phone, then that’s great! What I’m trying to do here is push people away from paid products that don’t improve their video while claiming that they do. I have a real disgust for misleading newbies and wasting their time, and things like log gamma on 8-bit cameras make newbies think they’re the reason their footage is bad rather than the inappropriate choice to use log gamma. I don’t want to discourage anyone from filmmaking and videography. This is a guide to navigating a minefield of snake oil that’ll gladly take your money and run, not a detailed document made to hate on cell phone videographers. I also made a follow-up video about the comment and my intentions.

UPDATE: There is now a short video that scratches the surface of what’s explained here if you don’t feel like reading everything below. If you’re interested, give it a watch: “No, This Doesn’t Look Filmic – Shooting log, flat, and LUTs all suck”

Part of being a professional in any field is understanding where mistakes are easy to make and what little details make a big difference in the end result. If you’ve skimmed this blog, you already know that I’m a big obnoxious noise-maker when it comes to shooting down the bad knowledge of “shooting flat” or “shooting log” on most cameras. The reason is simple: basic math and basic understanding of how color is stored says it’s a bad idea. Unfortunately, there is a huge body of YouTube video work out there filled with bad advice. These tend to use phrases like “the film look” and “more dynamic range” and “cinematic shooting” and “make your video look filmic.” The vast majority of these advice videos are poor, and because they’re doing a video to show off how great of an idea it is, the demonstrations often look poor too.

I ran into such a video recently and dropped the usual short nugget about not shooting flat or log on 8-bit cameras and how professionals don’t do that. The person who posted the video responded to my comment and it provided a wonderful opportunity to expound on the subject further. This starts with the video description and each successive comment in the chain. This post’s secondary purpose is to archive what was said. I hope you learn from it, in any case.

The following frame grabs are from the video. Though they will have suffered some degradation from YouTube compression and can’t be viewed as equivalent to what you’d get straight out of the camera, they are DEFINITELY what you can expect “FILMIC PRO LogV2” iPhone footage to look like after it’s been uploaded to YouTube!

The Conversation Begins

Description: “Whoa. FiLMiC Pro LogV2 is here! We’ve been testing it for a few weeks, and…It’s pretty great. Up to 12 stops of dynamic range on the latest iPhone XS and new higher bit rates nearing 140Mbps. It will even breathe new life into your older iPhones (like iPhone SE and 6S). Watch the video to learn more!”

Me: Or just shoot without log nonsense because it doesn’t play nice with 8-bit output files, and get the image right in-camera. You know, like an actual videographer that actually knows how to do video work would do.

Video poster: If you have a log option then you can’t match that in camera. The DR just isn’t there. So shooters that know what they’re doing use it. This log was created to work in 8bit very similar to how Canon Log was designed for 8bit video. They both work great and actually have many of the characteristics of 10bit. For example, the blue sky holds perfectly in grading – no banding that often happens with other 8bit log footage or just 8bit footage in general. You should give it a try.

Me: Dynamic range isn’t that important, especially when we’re talking about a maximum of half a stop obtained by sacrificing color difference information, introducing quantization errors in the corrected footage, and further losing subtle color gradients to macroblock losses in the H.264 AVC compression algorithm. I have run multiple tests on footage shot with a variety of supposedly better picture profiles on 8-bit footage from neutral to “flat” to log and the flat/log footage is always worse: it breaks faster, it has clear loss of find detail even before any grading is done which is even worse after correction, and the dynamic range increase is not enough to noticeably improve the overall look of the footage.

I’m concerned that you said it’s similar to 10-bit footage. There is a fundamental misunderstanding of what 10-bit depth does demonstrated in that statement. It’s a matter of precision. There is no benefit to 10-bit footage that is not being graded or is only going to be minimally graded because the quantization errors introduced across small changes are so small that they result in no visible side effects. When the stored color curves are significantly different from the desired color curves, there are much larger quantization errors introduced in the push back to normal colors and these are responsible for the ugly color issues (especially the plastic-looking skin tones) in corrected flat/log 8-bit footage. 10-bit precision eliminates these quantization errors because they store (relative to 8-bit color depth) a fractional component with 2^-2 precision that causes the curve change calculations to make much better quantization (rounding) decisions even if the “push” constitutes two full stops worth of difference.

You can get away with weird color profiles for such footage due to the added precision, but 8-bit color is already truncated to the same precision as the destination color depth, so further rounding operations during correction work is almost exactly the same as if the 10-bit rounding is simply floor rounded (truncated) also. Multiple operations can compound the problem further. Look up how a number like 1.1 is stored in IEEE 754 floating-point and why the historic FDIV bug in the first-gen Pentium CPUs was such a big deal for a better understanding of the issue of numeric precision problems in computing. The same principles affect log-to-standard correction of 8-bit footage.

I get a response and I’m not impressed

Video poster: Thanks for the detailed analysis! For most DPs dynamic range (including highlight roll off) and color science are the most important things. That’s really the primary reason the ARRI Alexa has been the king of movies & TV. Even before they had a 4K camera. Now here we’re obviously not talking about that kind of performance or quality, but the new LogV2 increases the DR significantly – 2 1/2 stops equivalent on an XS Max. 2 stops on most other devices. It also has better highlight roll off. So these things alone make it worth using and will give footage a more cinematic feel (something we almost always want).

Regarding 10bit that was stated as “characteristics” of it, which is true in our experience with the example mentioned. It’s obviously not 4:2:2 10bit color space, but like Canon Log which was specifically designed for 8bit video, this new LogV2 performs exceedingly well in this environment. Very low noise and compression artifacts also. Would say the new higher bit rates help here, too

We don’t pretend to understand exactly how all this is done now with computational imaging etc. as we’re filmmakers not video engineers or app developers. But the results speak for themselves.

The best part is this is all just getting started. Can’t wait to see where computational imaging in photography and video can go.
I can respect the cordial reply and I can definitely get behind how exciting of an era this is for people who want to make great video. The tools and education have never been more accessible. None of that has anything to do with my main assertion: flat/log footage on 8-bit camera gear is always a bad choice. As explained in my previous comment, mathematics agrees with me: you can’t magically fit >8 bits of data in to 8 bits, then stretch that compressed data back out (using curves to change one set of color curves to match another) and have it still retain 8 bits of precision after that set of calculations is applied and rounded to still fit in an 8-bit space.

Let me now argue against the points made directly here, and then I’ll post my response comment. I’m skipping most of the post because “has the characteristics of 10-bit” is total bullshit; simple math says that a 256-range color channel can’t represent anything close to what a 1024-range color channel can represent, so that entire line of reasoning is off the table. The note about importance of highlight roll-off is correct, but the ballet images earlier in this article demonstrate yucky highlight roll-off, so I’m not sure where the knowledge ends and the marketing blindness begins on that one. Chroma subsampling isn’t implied to be 4:2:2 by them, so that’s an easily dismissed mention. “Very low noise and artifacts” makes me seriously question if they’ve ever looked at how their footage falls apart, even once! As for not being a video engineer or app developer, neither am I. I just happen to have done more than my fair share of research.

Proving them wrong using their own footage.

“For most DPs dynamic range (including highlight roll off) and color science are the most important things” – first of all, where are you getting that information? Do you know most DPs? Do you actually understand highlight roll-off and color science? Your own video pushing this log shooting app for an iPhone shoots down everything you’re saying! Here, take a closer look at some more stuff from the video:

Xyla test chart

I can see 10 and 11 in “Natural.” They won’t show on a limited range HDMI display due to black levels 0-15 clipping, but they’re DEFINITELY there. Leaving 10, 11, 12 off is intentionally deceptive. Flat styles give you 0.5 stop more dynamic range at best, and their “proof” of 2.5 stops more DR proves them wrong.

This is my favorite test: use Levels in GIMP to crank up contrast, brightness, and bring shadows into midtones. Here, the truth comes into full view. On the left is a 2x zoom of the right side of the FiLMiC PRO LogV2 Xyla dynamic range test chart above, shown exactly as it came from the YouTube video, while the right is my heavily boosted version that pushes the data to its limits and shamelessly reveals those limits. There are some major things that stand out here:

  1. “Natural” has non-clipped black data all the way to the “12” slot, so Natural has 12 stops of dynamic range despite the misdirection that it’s only 9 stops.
  2. The log image on the bottom has brightened shadows, but even at number 8, it’s falling apart. The full damage of dynamic range compression caused by 8-bit log footage is obvious: the “natural” stop bars have more consistent (and therefore useful) color down to at least stop 9 and possibly even stop 10, but the log footage already has inconsistent color at 8 and by 10 it’s jumping all over the place. Even down to 11, the “natural” setting has more consistent and desirable behavior when pushed than the log one does.
  3. At stop 12, there’s basically zero useful information in either profile other than “clipped black” or “one value above clipped black.” Despite this, the log footage is clearly a worse choice at stop 12: it’s so noisy and so mangled by the H.264 AVC compression’s macroblocks that it’s actually revealing garbage data as if it’s legitimate. This is why flat/log profiles on 8-bit cameras (and even to some extent on ALL cameras) don’t actually help: the lowest blacks are full of noise and those profiles result in amplification of the noise.
  4. It’s not part of the stop bars, but…do you see how the solid black background around the bars is a dark grey on “natural” and a more medium grey on the log profile? It’s one thing to show near-black as a crumbling noisy region that’s almost completely invisible, but the total-black blacks being brighter on the log profile shows that it doesn’t even use all the bits appropriately all the way down to solid black. It’s wasting bandwidth, so to speak.

That by itself is pretty damning evidence against the log profile they’re marketing, but I got really curious after calling out the missing “10 11 12” and I wondered: “is there anything PAST 12 that just can’t be seen with the naked eye?” I popped the capture of the Xyla chart back open in IrfanView and did a gamma correction as high as it would go to see what would happen. Remember my assertion that you only gain 1/2 stop max of dynamic range by using log profiles, the one that they denied by saying they got 2.5 stops more DR instead of 0.5? Remember that as you look at the following image.

Half a stop later, we’ve seen the light

Dynamic range chart with stop #13 visible
Oh look, it’s dynamic range the 13th. Jason’s calling, it’s for you.

That’s right! There are some tiny bits of light squeaking through the non-numbered stop #13 on the log profile but not on the “natural” one. It’s clearly not enough to usefully pass through the full stop difference between 12 and 13, but it’s squeaking by in tiny amounts anyway, so that’s probably 1/2 stop of light. Gee, where have I heard “log footage only gives you a maximum of 1/2 stop of added dynamic range” before? Well, I’ll be honest: I originally got all the answers I’d ever want on this subject from an amazing and detailed article on flat/log picture profiles that pulled very few punches when it comes to explanations; I HIGHLY recommend reading it and looking at the excellent graphs and demo images to get a comprehensive understanding of what goes on behind the lens with flatter picture profiles.

While you’re still looking at the image above, take special notice of what the grey area that is supposed to be black looks like. There is inevitably going to be a little bit of light spill from the heavy white side and it’s supposed to taper off as the darkness of the stops increases because that’s just how light works. The “natural” black area has a nice even circle around the brightest stops and it tapers off nicely as it slowly approaches 4. Contrast (pun intended) this with the log profile and you’ll notice that the log profile’s not-quite-black area looks horrible. Not only does it look over-exposed, but there are quality issues all over the place! The smudgy black holes are from compression artifacts being amplified as hard as they can be amplified. It sort of looks like this fancy log profile is mostly just exposing everything higher from the outset . I’ll let you decide what’s going on, but I’m going to say right now that the “natural” profile is the clear winner in this petty little fight.

But wait! We’re not done yet! I’ve completely blown the “FiLMiC PRO LogV2” video in question out of the water, yet I have a few more images to show you to seal the deal, plus my response to their response. Here’s a set of images they displayed of a creek in “natural,” LogV2, and LogV2 with a LUT applied to grade it. Look at these images and pay special attention to differences between them:

If you clicked through the three full images and really paid attention, you probably noticed the same thing I did: the sunlight accent on the left side has been all but lost in the log footage! Not only that, but the stream, ground, and glare on the leaves have been brightened so much that the image has lost any sense of depth it had in the “natural” version. It’s…boring and flat now. The log footage has more shadow detail, but the leaves betray the real reason: the log footage was exposed higher than the “natural” footage. It’s not better because it was shot in a log profile, it’s better because the competition was improperly exposed!

My response to their response

Me: 4:2:2 is chroma subsampling and isn’t really an issue with 8-bit/10-bit compared to compressed color curves. How did you determine that you’re getting 2.5 stops of added dynamic range? What was the dynamic range before? Is the dynamic range in question absolute dynamic range or is it usable dynamic range? The video implies that it’s a guess.

I have looked closely at your 1080p ungraded/graded footage in this video (particularly around 4:15) and I find that there are some serious issues with it; ironically, they’re in the places your arrows point: the noise and macroblock compression banding in the blacks before and after grading are unacceptable to me, as is the highlight banding on the ballerina’s right side and the blocky “plastic” look on her face where a smooth gradient should be. The footage immediately after that’s shot “natural” looks drastically better, though the skin tones need to be a bit desaturated. That’s the thing: it’s 100x better to remove that color difference information in post than to throw it away for more dynamic range and be unable to restore it without heavy secondary corrections. Anyone who wants to confirm what I’m saying can skip between 4:15, 4:20, and 4:35 and decide for themselves.

At 1:45, the natural shot clearly has better color, more detail, and less glare, but it was also underexposed relative to the log footage; since it’s not a high-contrast scene, you could have easily exposed the natural footage a bit higher to retain more of the stream detail. Also notice on the left at 1:35, you’ve got a shining bit of sunlight; that shining bit of sunlight is largely lost after the log grade is applied at 1:41; in fact, the lowered contrast is less attractive because there is no visual depth.

At 8:45, the doll image from the phone is more washed out and obviously lacking in fine detail, most noticeable in the eye detail and in the sharpness of the stripes on the dress. The color lacks a punch that’s visible on the right. I am aware that some of this is because it’s a phone. The results aren’t bad for a phone, but the results are nowhere near equivalent. In the end, I suppose what matters is that the person watching the finished product likes it, so do what works for you. I like a healthy dose of contrast and color, but the washed out desaturated look seems to be all the rage these days, so who am I to argue with the trend?

What should you take from all of this?

tl;dr: Don’t shoot flat without 10-bit color and a professional-grade workflow or you’re trashing your footage, regardless of what some “expert” on YouTube says. It doesn’t look like film, it just looks like amateur hour.

Supplemental information about dynamic range measurement with Xyla charts: Is it really possible to measure a camera’s dynamic range?

Why would you choose a camcorder over a mirrorless camera? Here’s why.

In a YouTube comment chain, there was a lively discussion about auto-focus on mirrorless cameras in which I suggested that anyone needing good auto-focus would be better off using a real camcorder than a camera in the “stills camera” style of a DSLR or mirrorless camera. I wrote the following in response to the question “why do most vloggers use mirrorless cameras then? I have never seen a vlogger with a camcorder. My [Panasonic] G7 has actually been serving me very well, partly because I don’t know much about video.”

Why do so many coffee drinkers buy Starbucks? Why do so many editors use Apple computers to run Premiere when PCs are objectively a better value and have much lower total cost of ownership? Ever since the Canon 5D Mark II made inroads into Hollywood (which, incidentally, is why Technicolor CineStyle exists and why normies shouldn’t touch CineStyle) it has been fashionable to buy a Canon DSLR and use it as a video camera. When mirrorless cameras came out, they simply offered a metric ton more advanced features than Canon cams at the same price point because Canon artificially segments their camera market by literally turning off features in software on cheaper cameras (my old T1i got focus peaking with Magic Lantern, for example).

The Panasonic GH4 was the first mirrorless camera with 4K and it was way cheaper than Canon’s full-frame lineup which had no 4K but still had lots of momentum, so we saw a lot of people jump ship to Panasonic’s GH4 for the cheap 4K with interchangeable lenses. No one cared about Sony mirrorless cameras until they came out with the first mass-market full-frame mirrorless bodies, which somehow magically made their cheap mirrorless cameras seem amazing by pure name association; everyone ignored Sony’s garbage highlight rolloff and heavy video noise reduction that kills most of the fine detail in your shots.

Mirrorless cameras are a trend and the sheep follow the trend. Full-frame mirrorless across the major manufacturers that aren’t Sony was an inevitable trend too, and people are starting the trend, flocking largely to the EOS R system for full-frame mirrorless video. What’s the EOS R system, really? Well, it’s a 5D Mark IV designed with the flange distance of a mirrorless lens system rather than that of a standard DSLR lens system. They had a neat idea to add a general-purpose on-lens electronic control ring to the EOS R system which was very smart, but other than that, it’s ultimately nothing more than a repackaged 5D Mark IV core, and it’s crippled to avoid cannibalizing the market served by the very expensive Canon C-series digital cine camera line. People would get far more features and value out of Panasonic’s FF mirrorless system just as they did with Panasonic’s MFT cameras, but…Canon’s a big name, Canon’s still got 5D Mark II momentum, and Canon announced a little earlier, so the sheep continue to follow the trend.

Smaller sensors and camcorder ergonomics are extremely useful. Small sensors require smaller, lighter optics. Small sensors have a much larger depth of field which means you can’t easily shoot a bokehlicious shot like on a big camera, but you will rarely (if ever) miss focus. Backgrounds are important and DSLR shooters tend to blow the backgrounds too far out of focus chasing that “film look” shallow DOF that usually doesn’t look as cool as they think it does; camcorders don’t do that, so you don’t have to worry about the context provided by the background being lost (if you’re walking around in a city, don’t you want people to see more than just your face and a blur of mush around it?) Small sensors are much easier to stabilize because they’re lighter. They don’t overheat easily. They use a lot less power and their rolling shutter (aka “jello”) tends to be far less pronounced. Because camcorders are sealed optical systems that’ll never be changed, the glass inside all but the cheapest ones tend to be very high in quality.

Camcorder ergonomics are a big deal because they’re designed explicitly for video first. You can comfortable hold a camcorder at the height of your neck for a long time thanks to the right hand strap and the way it conforms to your hand when your arm is locked upright, but you’ll have a pretty hard time doing the same with the grip style of a photo camera. That’s why so many people end up buying handles and grips and cages for stills cameras used for video, which constitutes an added expense and an imperfect solution. Camcorders have a zoom lever at your gripping hand’s fingertips; all stills cameras have those controls as rings on lenses and you’ll have a very hard time zooming on a non-rigged stills camera without wobbling the shot, never mind that it’s hard to move non-electronic lens rings both slowly AND with a fluid motion at the same time.

Camcorders also have a unique advantage when you want to use remote control: if I use my Panasonic G7 in the Panasonic app, I can control the camera and the aperture and focus in the lens, but I can’t control the zoom on the lens at all. There are expensive remote lens servo systems that can do this but again, that’s an added cost over just getting a camcorder instead. The same Panasonic app connected to my Panasonic VX870 4K camcorder can control the zoom remotely. I have actually used this; I mounted the VX870 on top of the floating ceiling of a bar area in a restaurant to point it down at both the dance floor and stage. I needed to change the shot to be closer during the show because it was too wide, but I couldn’t get the 12 foot ladder back out during the show. The remote app let me punch in further and tighten up the shot from the ground, greatly improving the footage.

I’d also like to point out that both action cameras and gimbal+camera all-in-one units like those made by DJI are camcorders, not stills cameras, and are used by quite a few vloggers. I’d also point out that many other people just use a flagship phone on a stick because they already have a fancy phone with a fancy internal camera in their pocket. Sometimes the camera choice just doesn’t matter that much and it’s all about what you can do with what you already have.